Setting the Shop page
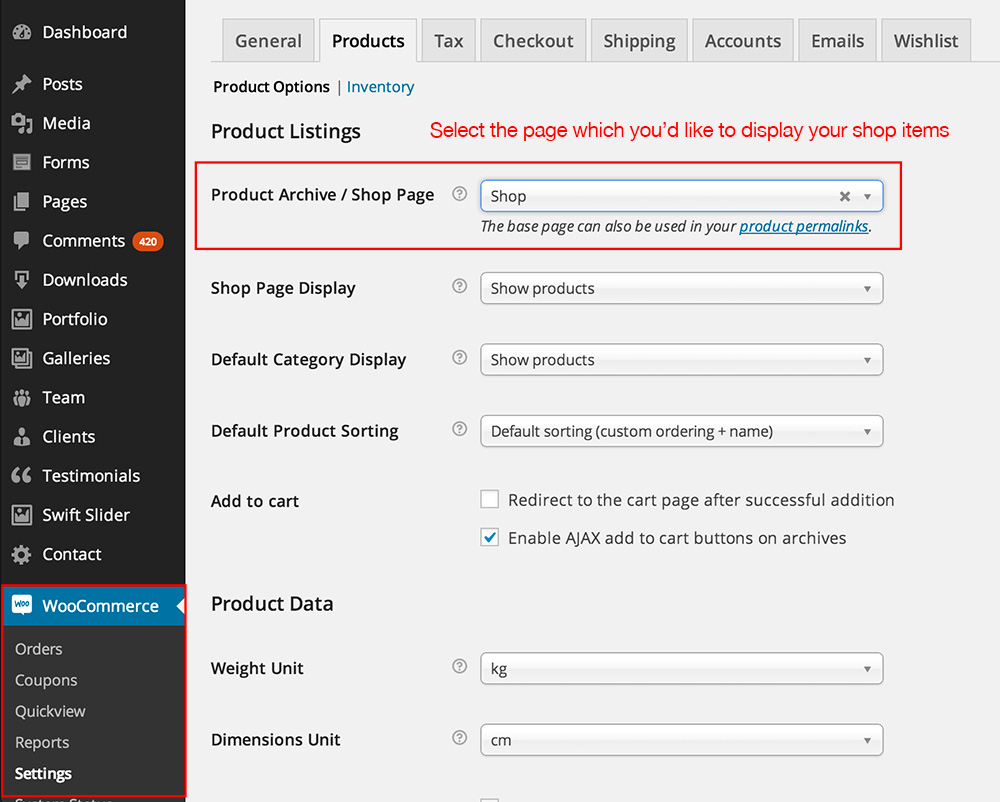
To display your products, you will want to create a page, leave the content blank, and then set the “Product Archive / Shop Page” in WooCommerce > Settings > Products. Here you can select the page, choose whether you show categories or products on the main shop page, the default sorting, and more.
If you would like to add products within a page that you create using the page builder, you can also use the Products & Products (Mini) assets.
Adding a product
To add a product, you need to go to Products > Add New from the left WordPress admin menu.
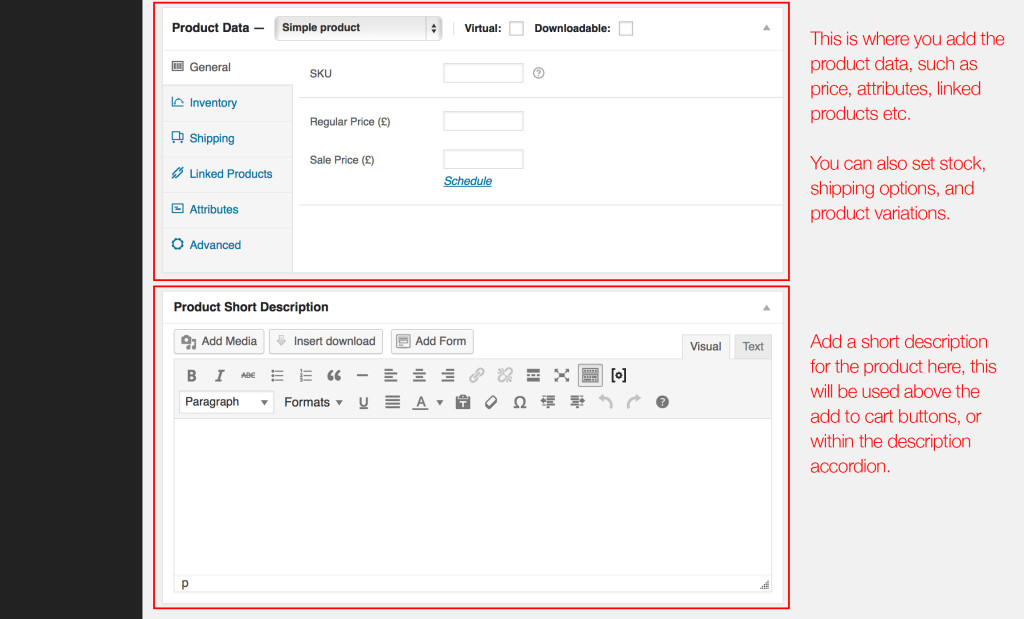
Once you’re on the Add New Product screen, you will then be able to set a title for the product item, add the description, and also provide all the data information such as price, stock status, attributes, etc.
You can add a featured image in the right column box, and above that set any other gallery images. Any images you add here will be used for the product slider images.
If you would like to create a product where you can select the size/colour of a product for example, and for setting categories/attributes then please check out the following guides:
Product Variations Product Categories & Attributes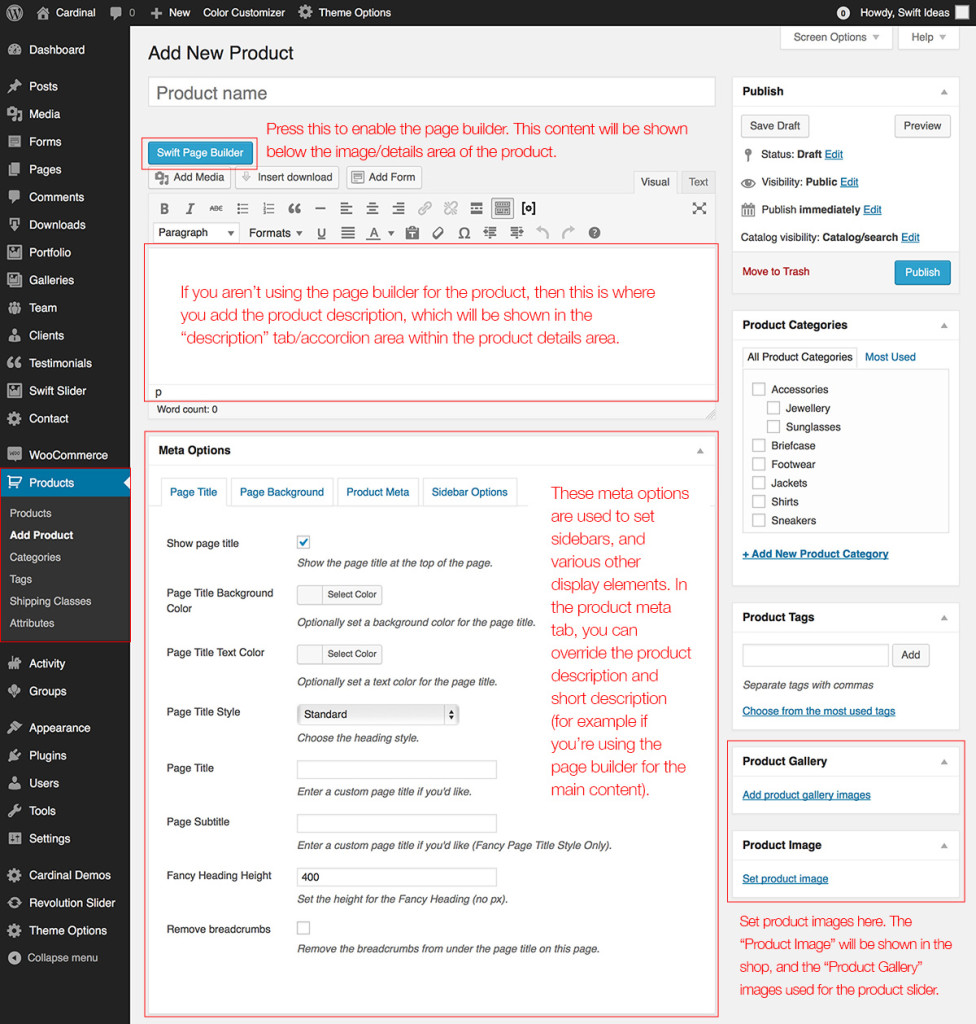
Quickview Functionality
The excellent “WooCommerce Quickview” plugin is included with Cardinal as standard, this will allow you & your customers to quickly preview items from the shop list, and navigate between them, without having to navigate to the product pages. If you haven’t installed the plugin, then please go to Appearance > Install Plugins, and then install & activate “WooCommerce Quickview“.
Once you’ve activated this plugin, you will have a new menu item under the WordPress menu, titled “Quickview“. For the tigger settings, we recommend the settings which we’ve detailed in the screenshot on the right.
Note that as standard, there is a theme option set which shows the Quickview button only on hover. You can enable/disable this in Theme Options > WooCommerce Options > Shop Options.

Product Zoom Functionality
Product image zoom functionality is built into the theme as standard, no plugin required. To enable the zoom functionality, simply turn on the option in Theme Options > WooCommerce Options > Product Options. The option is titled: Enable image zoom on product images.
Wishlist Functionality
The “YITH WooCommerce Wishlist” plugin is recommended with Cardinal, as this will allow you & your customers to add products to a “wishlist”, which you can then save and share if you like. If you haven’t installed the plugin, then please go to Appearance > Install Plugins, and then install & activate “YITH WooCommerce Wishlist“.
Once you’ve activated this plugin, you will have a new tab item under the WordPress > Settings menu, where you can set various options.
Be sure to check Theme Options > Header Options, as there is a toggle here to enable/disable the wishlist menu item & dropdown in the header.